Gaming on an Android VM on Linux
So you can do the gacha grind on your computer instead of your phone
I wanted to run Android games (specifically Arknights) on my NixOS box, but Anbox seems to be broken on NixOS. So, I figured out a way to make it work in Libvirt. Other people wanted to do it too, so here’s a guide.
Assumptions about you
- You know how to navigate an Android device
- You know how to navigate Libvirt
- You can troubleshoot issues, because this guide is provided “AS IS”, WITHOUT WARRANTY OF ANY KIND…
Ingredients
- Libvirt and virt-manager installed on your computer. You can figure that out yourself for your own distro.
- An Android-x86 ISO. We’ll be using the latest Android 9 version. The homepage has links to the download.
- libhoudini. This is a kernel module that does ARM to x86 translation. You can find more information about it at this Github repo, but hold off on downloading it for now because we’ll want to actually put it on the Android VM.
Recipe
1. Create a VM
You’ll want to create a new VM with the downloaded ISO as your boot disk. When prompted for the type of OS, select Android 9.0.
As for specs and storage space, you should consider how much space and power the games you’ll play want. I just went with 4 cores and 8gb RAM, but 8gb might admittedly be overkill.
Before booting your machine, make sure to do the following things to your VM’s configuration:
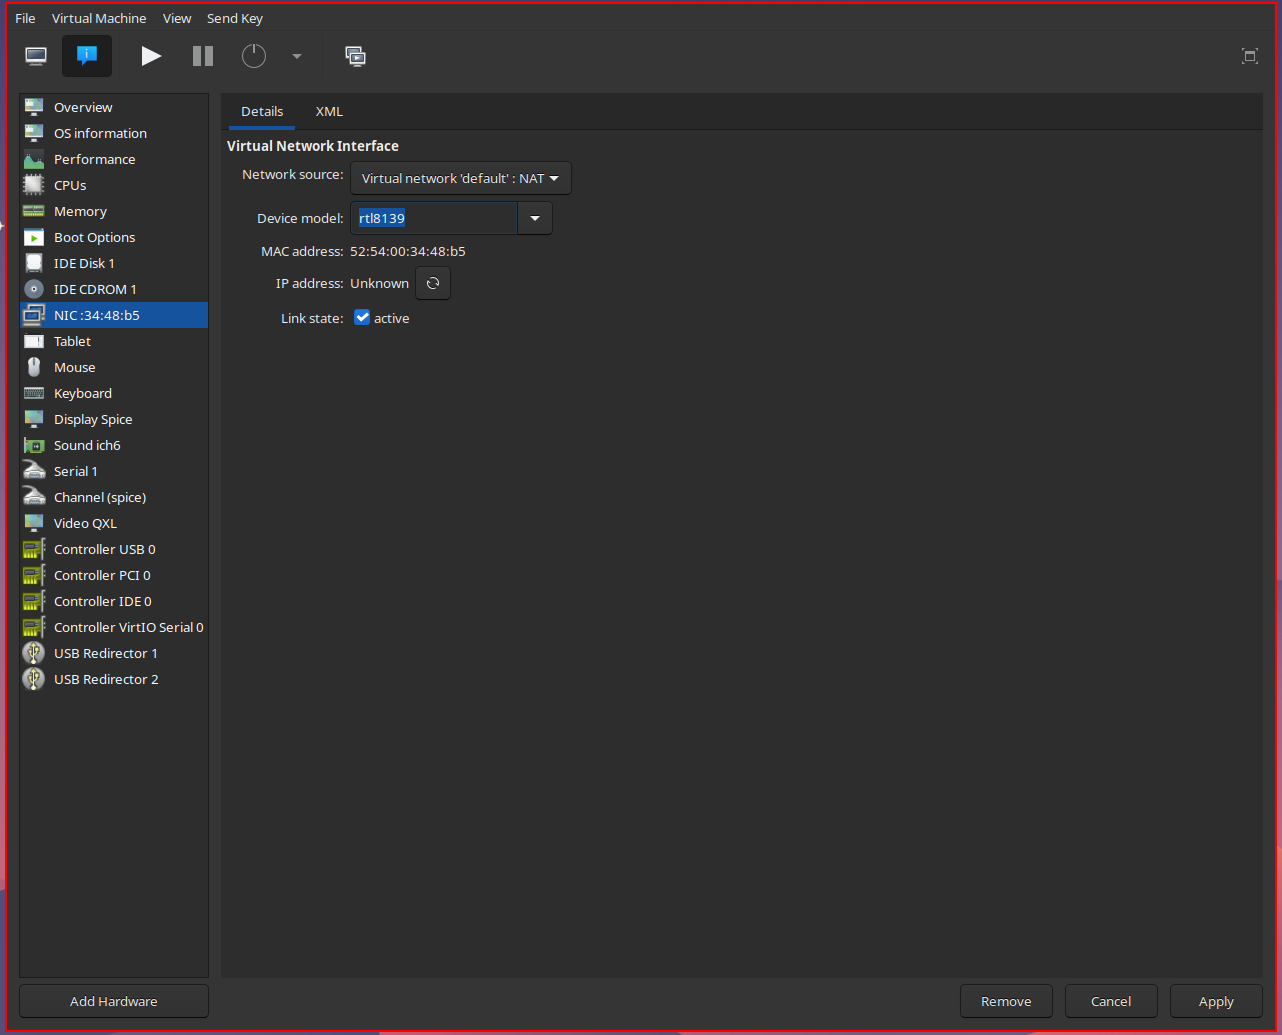
Pretend your internet is Wi-Fi
Android doesn’t like ethernet connections for some reason, you’ll want to set your NIC to use the rtl8139 device, which emulates a wi-fi card.
Enable 3D Acceleration
Go into the Video device, and set it to Virtio. Make sure to check the 3D acceleration box.
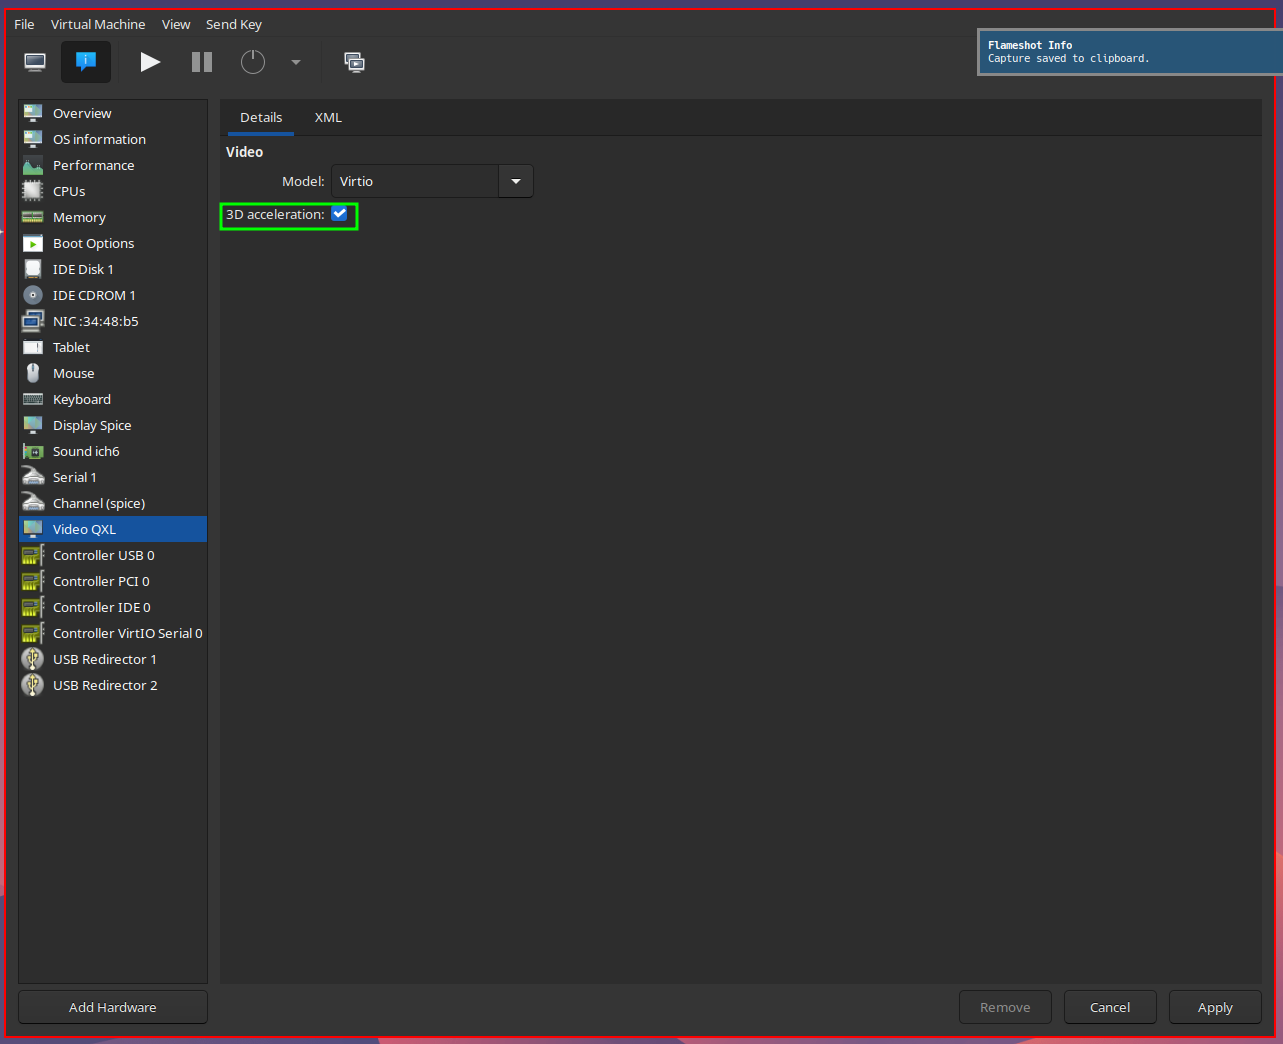
However, you aren’t done; if you run the VM now, you’ll get an error complaining that it can’t find OpenGL. You need to go to the Display Spice device and set “Listen type” to None, and check the OpenGL box. OpenGL will ask you for a GPU to use (given by their PCI addresses) so select the one you want to use, or Auto to have it guess.

2. Partition, format, and install
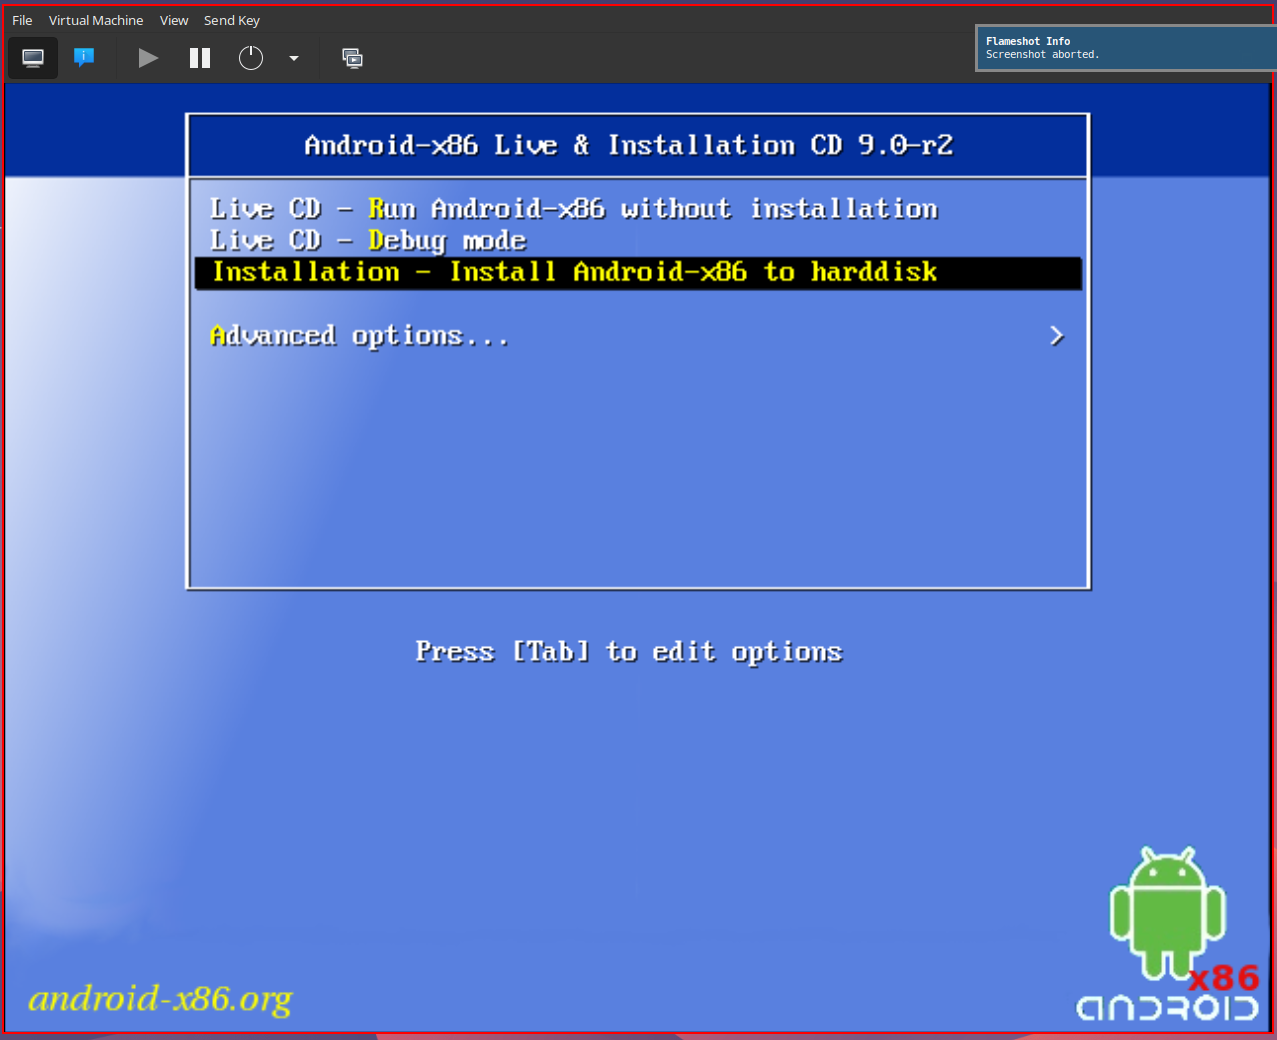
Run your VM and you’ll be greeeted with this screen. Just go to the “install” setting.
It will ask you to pick a partition, but there’s no partitions, so you’ll have to use the built-in partition manager.

You’ll just want to create a MBR partition table with 1 partition on it.
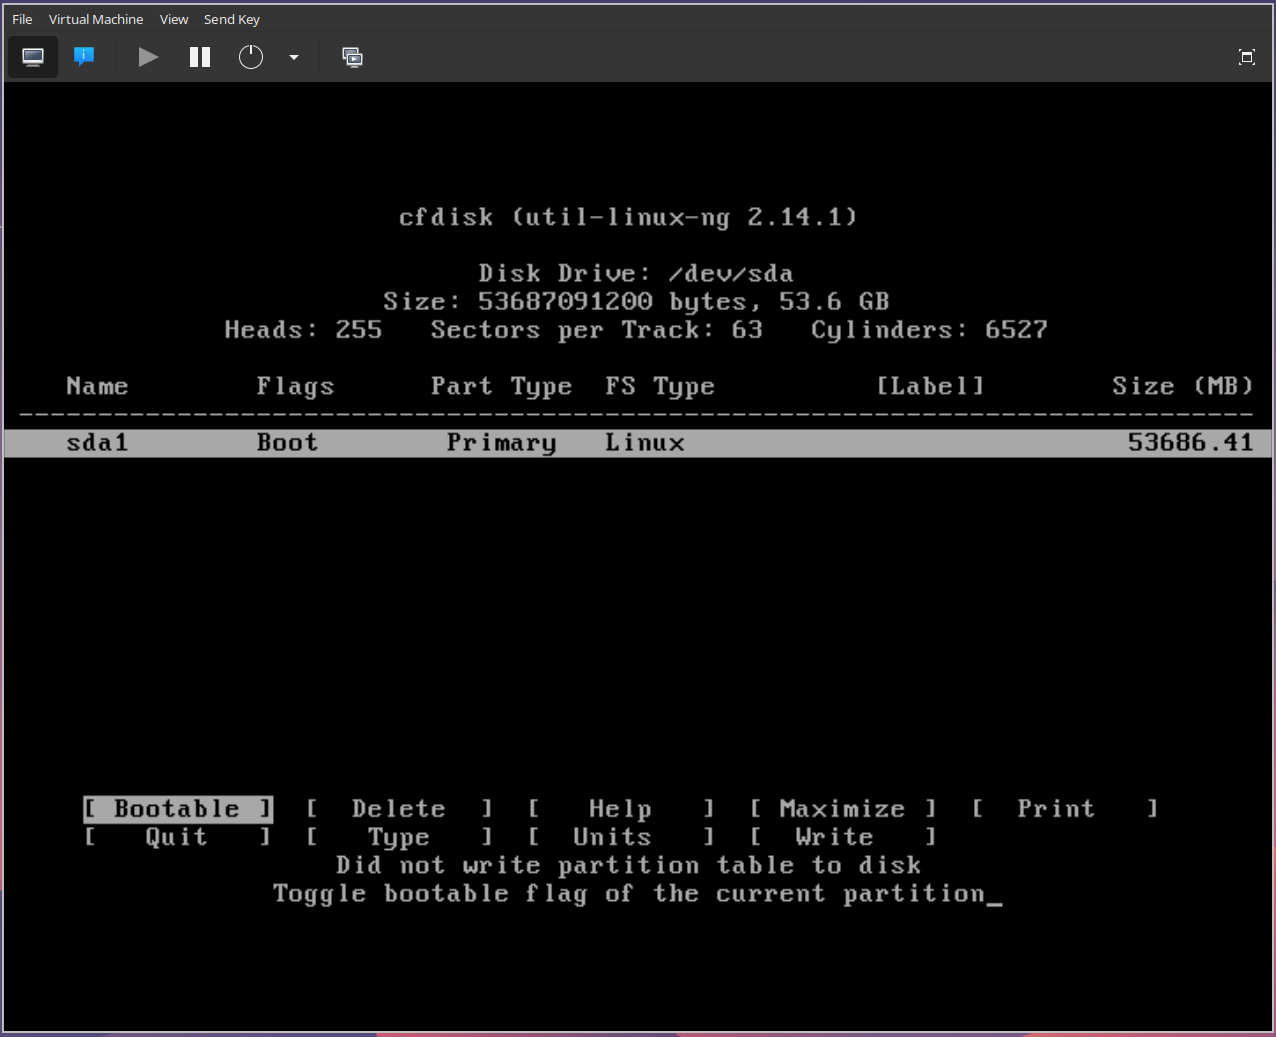
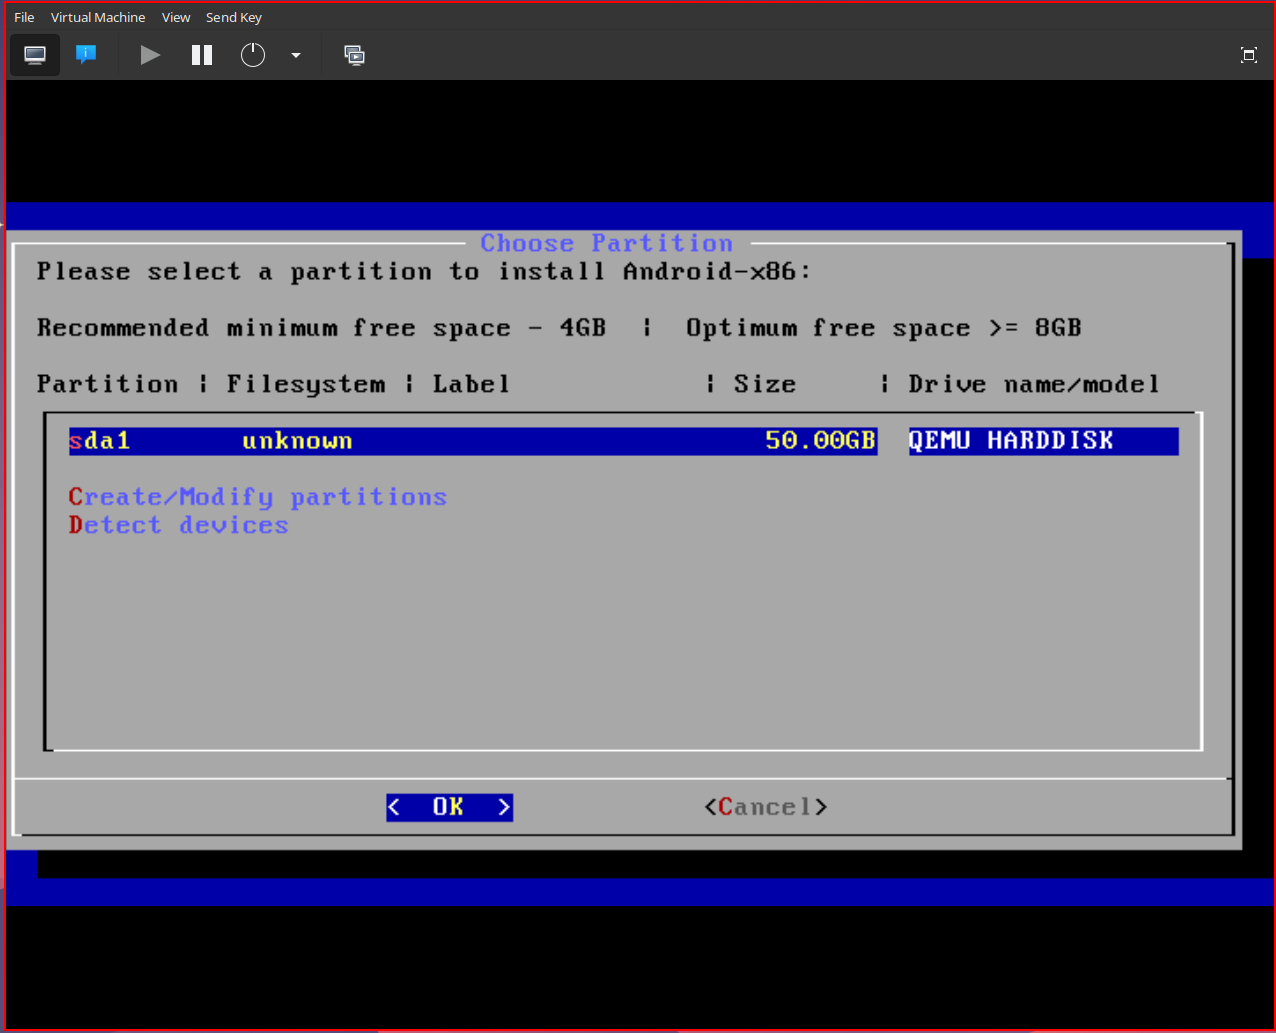
Then, when you quit the partition manager, you can select that one partition, and follow the wizard:
- Format sda1 to the ext4 filesystem
- “Install GRUB?” > Yes
- “Install /system directory as read-write?” > Yes (this allows for installing libhoudini)
Then, you’re all done with installation, and you can reboot.
3. Booting and setting up Android
If all goes well, Android will boot and go into the setup screen.


Now, just set up the machine like any normal Android device.
- Note that when connecting to Wi-Fi, there will be a single WAP called VirtWifi.
- You don’t need to sign in to your Google account to install apps if you don’t want to. Aurora Store works as an alternative that doesn’t require a sign-in. Note that it might not work for some apps that require the Google Play Store APIs, so if you want to err on the safe side, just use the Play Store.
- Android will prompt you for a Home app. While Taskbar is meant to provide more of a “desktop-y” experience, I’ve found that some apps are rather buggy with it (like Google Play Store), and Quickstep (a traditional mobile Home) is just more reliable.


4. Install your games or whatever
It doesn’t matter if you install your apps before or after setting up ARM translation. I prefer to do it before so that I can take a VM snapshot and not have to download so many things in the next (somewhat error-prone) step goes wrong.
Your games might crash on boot. That’s okay, we fix it in the next step.
5. Set up ARM translation
This step is needed to play games that are only packaged for ARM. Note that some games might trick you and pretend they work on x86 and install properly without warnings (I’m looking at you, Arknights), but they’ll crash on start. It’s just safest to do this step first.
Open up the Terminal Emulator app and start running commands!
a. Enter root mode
su
obviously puts you into root mode. You might need to say “yes” to a confirmation.
b. Download libhoudini
wget -O /etc/houdini9_y.sfs http://dl.android-x86.org/houdini/9_y/houdini.sfs
The -O flag is especially important because it needs to be in a very specific
spot on your filesystem!
Also, Android’s version of wget doesn’t seem to like https, so you’ll just have to deal with http. Shoulda thought about that before getting MITM’ed.
c. Create missing directories and files
touch /etc/modprobe.conf
mkdir -p /etc/modprobe.d
For some reason, these files are missing when you install Android-x86, which is really weird because you’d think that they’d be very important files. No matter; it’s required as a workaround for the next part.
d. Enable native bridge
enable_nativebridge
This script does a bunch of things (good things, I’d hope) but it seems to enable the ARM translation
e. Check it in the settings
Now, go turn on Settings > Android-x86 options > Enable native bridge.
Once all of these steps are done, you should be able to play ARM games inside the VM! If not, try rebooting. If that still doesn’t work, then I don’t know.